🔍 The Ultimate Guide to Media Library Hard Drives for Your Smart Home
The modern American home, especially one equipped with smart devices, is a constant creator of high-definition data. From 4K family videos to expansive digital music collections and terabytes of surveillance footage, the fundamental problem you face is simple: where do you safely and efficiently store it all? Relying on fragmented cloud subscriptions or scattered external drives is impractical, expensive, and leaves your data vulnerable. This is the core problem that specialized Media Library Hard Drives solve—they are the dedicated, high-capacity, and reliable foundation for your entire digital life.
1. 🔍 The Deep Dive: Understanding Your Media Library Hard Drives
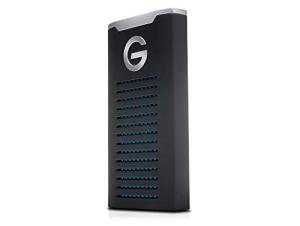
Media Library Hard Drives are not the same as the drive that runs your desktop computer or a simple, portable external drive. Their core functionality is built around continuous, demanding use. They offer massive storage capacity—typically 4TB, 8TB, or even 16TB and beyond—specifically optimized for the kind of 24/7 monitoring and high-volume data transfer required by a comprehensive smart home setup. They are the backbone of your Network Attached Storage (NAS) system, designed to handle multiple simultaneous read and write streams without corruption. This means your smart security cameras can constantly write footage while you simultaneously stream a 4K movie to your living room and back up your laptop.
These specialized drives offer a dramatic step up from conventional desktop drives. A standard desktop drive is engineered for intermittent use, perhaps 8 hours a day, and is not rated for the heat, vibration, or constant operation of a server environment. In contrast, Media Library Hard Drives feature technologies like rotational vibration (RV) sensors and advanced firmware that enable seamless integration and long-term reliability. If you’re a family in a dense urban area like Chicago, capturing continuous footage from four exterior smart cameras, you absolutely need a drive built for this demanding environment. This continuous reliability and massive capacity are why they are essential for serious digital preservation and remote access media streaming.
2. 🔌 Choosing Your System: Key Features and Compatibility
When selecting your storage solution, you will primarily encounter two essential variations of Media Library Hard Drives based on their core NAS classification:
Essential Variations
-
Standard NAS Drives (SATA/3.5"): These are the most common, offering the best cost-per-terabyte. They are ideal for high-capacity, multi-bay NAS enclosures in a stationary US home office or utility closet. Pros: Best value, huge capacity options. Cons: Physically large, higher power consumption than smaller formats. For a homeowner in suburban Texas storing years of security footage and 4K media, this is the practical choice for a central hub.
-
SSD/M.2 NVMe Cache Drives (Accelerated NAS): These drives don't typically handle the bulk storage, but they act as a high-speed cache for the standard drives. They drastically speed up frequently accessed files, like the metadata for your entire movie library or the current day's security footage. Pros: Extremely fast read/write speeds, silent operation. Cons: Much higher cost per gigabyte, low overall capacity for bulk media. If you are a professional working from a co-located apartment in Manhattan who needs rapid file access via Remote Access , an SSD cache on your Media Library Hard Drives is a game-changer for workflow and responsiveness.
Compatibility Protocols
The compatibility of your Media Library Hard Drives is less about the drive itself and more about the NAS enclosure and your home network. You need a robust networking backbone to utilize the drives effectively.
-
Ethernet (Local Area Network - LAN): This is the foundation. Your NAS enclosure will connect to your router via a CAT5e or CAT6 Ethernet cable. This hardwired connection ensures the fast, stable transfer speeds necessary for backing up gigabytes of data or streaming lossless audio throughout your home. Relying on Wi-Fi for this primary connection will severely bottleneck your system.
-
Network Protocols (SMB/NFS/FTP): The NAS itself uses standard network protocols like SMB (Server Message Block) to allow devices (like your PC, Mac, or Smart TV) to access the files on your Media Library Hard Drives . Any modern operating system will support these protocols natively, ensuring seamless data sharing across your entire network.
-
Third-Party Integration (Plex/Jellyfin): To truly maximize your media experience, you'll need the NAS to run media server software like Plex. This software transcodes (converts) your 4K media on the fly, allowing you to stream it flawlessly to any device, anywhere, using the Remote Access feature built into the application.
3. 🛠️ Installation and Setup Walkthrough
Setting up your dedicated storage solution using Media Library Hard Drives is more straightforward than you might expect, but it requires precision.
Pre-Installation
First, ensure you have a reliable Uninterruptible Power Supply (UPS). A sudden power outage, common in regions like Florida during hurricane season, can corrupt data while your Media Library Hard Drives are actively writing. Second, choose a cool, well-ventilated location—like a basement or a dedicated closet—away from high foot traffic. The vibration control technology in these drives is great, but minimizing physical disturbance is crucial for long-term health and consistent 24/7 Monitoring .
Installation Guide
-
Mount the Drives: Carefully slide your new Media Library Hard Drives into the drive bays of your NAS enclosure. Most enclosures use a tool-less tray design; secure the drive with the provided screws to minimize vibration.
-
Connect to Network: Plug one end of a high-quality Ethernet cable into the NAS enclosure and the other into a free port on your primary router or network switch.
-
Power On and Initialize: Plug in the NAS and power it on. Use a computer connected to the same network to navigate to the NAS device’s default IP address or network name (check the manufacturer's manual).
-
Create Your Volume: In the NAS operating system, you will initialize the drives. You should strongly consider a RAID configuration (like RAID 1 or RAID 5). This process "mirrors" your data across multiple Media Library Hard Drives , ensuring that if one drive fails, your family’s digital media and important files are safe—a non-negotiable step for long-term reliability and secure 24/7 Monitoring .
Troubleshooting
-
Issue 1: Drive Not Detected After Installation: Solution: The drive may not be fully seated in the SATA connector. Power down the unit, firmly push the drive tray back into the bay, and check the manufacturer's compatibility list; desktop drives often fail to register in NAS enclosures due to incompatible firmware.
-
Issue 2: Slow Transfer Speeds: Solution: This is almost always a network bottleneck. Ensure your NAS is connected via a gigabit (1000 Mbps) Ethernet port on both the NAS and the router. If you are copying data over Wi-Fi, try connecting your computer directly to the router to diagnose if the Wi-Fi or the drive is the limiting factor.
-
Issue 3: High Drive Temperature Warnings: Solution: Check your placement. Is the unit in a tight, unventilated cabinet? Move the NAS to an open, cooler space. Also, ensure the NAS’s internal cooling fan vents are not blocked by dust or other objects. Proper thermal management is key to the longevity of your Media Library Hard Drives .
4. Advanced Automation and Maximizing Value
The true power of Media Library Hard Drives comes from integrating the NAS they power into your smart life through automation and specialized features like Energy Efficiency modes.
Automation Scenarios
-
Security Camera Offload: Set up an automation rule that states: "If the total storage utilization of the Security Camera folder on the NAS exceeds 80% (indicating high activity or a retention limit being reached), then automatically compress all files older than 30 days and send an alert." This ensures your 24/7 Monitoring footage is never compromised by a full disk.
-
Smart Home Backup: Use your NAS’s built-in backup tools to target all smart home hubs (like your Google Nest Hubs or dedicated Z-Wave controllers). Set a nightly scheduled backup to the Media Library Hard Drives . For example: "At 3:00 AM, initiate a full system image backup of the smart home controller." This means if your hub fails, you can restore your entire smart home configuration (lighting schedules, security codes, etc.) in minutes, minimizing downtime.
Longevity & Maintenance
Your primary maintenance task is regular firmware updates for the NAS enclosure itself. These updates often contain critical security patches that protect your Remote Access feature and improve the system’s handling of the Media Library Hard Drives .
Additionally, utilize the drive's built-in Energy Efficiency features. Many modern NAS systems allow the Media Library Hard Drives to spin down after a period of inactivity (e.g., 30 minutes). While they are built for 24/7 operation, minimizing unnecessary spinning during periods like a weekday afternoon while you are at the office can conserve power and slightly extend the mechanical lifespan of the drives, offering tangible savings on your utility bill, especially in high-cost energy states like California.