🔌 Choosing Your System: Key Features and Compatibility
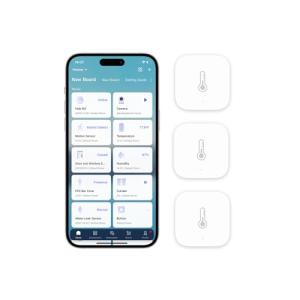
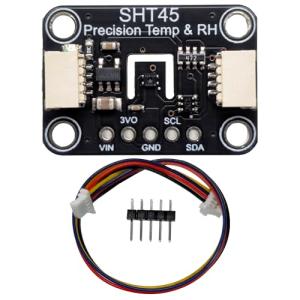
Selecting the right Environmental Sensors (Temp/Humidity) requires understanding the power source and communication standards best suited for your property's layout and your smart home ecosystem.
Essential Variations and Form Factors
The three most common formats you will encounter are designed to fit various needs within your US home:
-
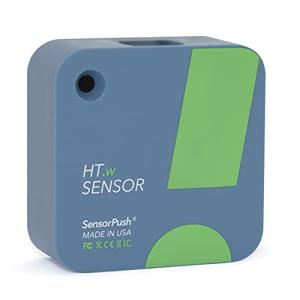
Compact, Battery-Powered Wireless Sensors:
-
Pros: These are the most common and versatile. They are small, easily concealable, and require no wiring. They offer incredible placement flexibility, making them perfect for monitoring temperature in a wine cellar or humidity in an infrequently used guest bathroom. Their low-power communication (like Zigbee or Z-Wave) often allows the battery to last a year or more, enabling robust 24/7 Monitoring without frequent attention.
-
Cons: They require an existing hub (Z-Wave or Zigbee) and are reliant on a strong mesh network. If the battery dies, you lose data until it's replaced.
-
US Lifestyle Context: Ideal for monitoring the temperature in a detached garage workshop in the Northeast during winter to prevent tool damage, providing Remote Access to critical data without running wires.
-
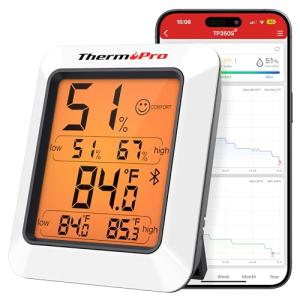
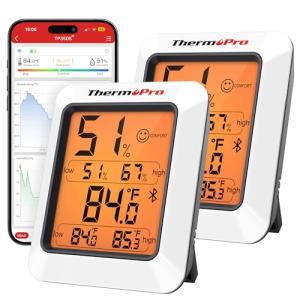
USB-Powered or Plug-In Sensors (Often with a Display):
-
Pros: These models plug into a standard wall outlet, eliminating battery changes. They often feature small LED or LCD screens that display the current readings locally, offering both physical and digital access to the data. This guarantees reliable, uninterrupted power for high-frequency data logging.
-
Cons: Limited to locations near an outlet, which may not be the optimal spot for environmental measurement (e.g., near the floor or ceiling).
-
US Lifestyle Context: Excellent for a home office where precise climate control is needed for comfort and data reliability. The always-on power ensures rapid alerts and consistent Energy Efficiency calculations.
-
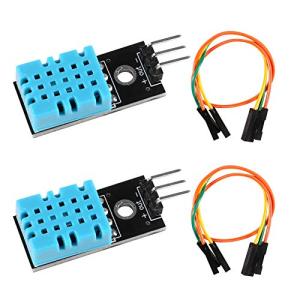
Specialized Probe/Wired Sensors (Often Outdoor or High-Risk):
-
Pros: These are heavy-duty models designed for high-accuracy or extreme environments. They often use a wired probe that can be inserted into an area (like an HVAC duct, freezer, or soil) while the main unit stays in a safer spot. They provide reliable, precise readings.
-
Cons: Installation is more involved due to the physical wiring of the probe or a dedicated power supply.
-
US Lifestyle Context: Essential for a homeowner in Arizona using a swamp cooler, requiring accurate outside air temperature readings to optimize cooling cycles and maximize Energy Efficiency .
Compatibility Protocols
For true automation, your Environmental Sensors (Temp/Humidity) must communicate flawlessly with your central hub.
-
Z-Wave and Zigbee: These are the gold standards for small, battery-powered sensors. They create a dedicated mesh network, allowing devices to relay signals to one another and back to the hub. This ensures reliable data transmission, low latency for critical alerts, and superior battery life. They are crucial for maintaining consistent 24/7 Monitoring .
-
Wi-Fi: Wi-Fi sensors are easy to set up but are generally less Energy Efficiency optimized, often leading to shorter battery life. They are best for plug-in models or sensors placed very close to your main router.
-
Thread and Matter: As the smart home moves toward universal compatibility, selecting sensors compatible with Thread (a modern mesh networking protocol) and Matter (the unifying standard) guarantees they will integrate seamlessly across different brands and voice platforms. This simplifies Remote Access and ensures longevity in your smart home setup.
3. 🛠️ Installation and Setup Walkthrough
Installing Environmental Sensors (Temp/Humidity) is straightforward, but correct placement is vital to ensure the accuracy of your climate data.
Pre-Installation Preparations
-
Network Check: If using Zigbee or Z-Wave sensors, ensure your central hub is powered on and within range of your planned installation spot. For large, multi-story US homes, you may need a few hardwired Z-Wave or Zigbee devices (like smart plugs or switches) acting as repeaters to create a strong mesh network path for the sensor.
-
Avoid Extremes: Never place the sensor directly next to a heat source (vents, windows, lamps, appliances) or a cold source (exterior walls, refrigerators). False readings will ruin your automations and your Energy Efficiency efforts.
-
Optimal Placement: The best spot is usually an interior wall, five to six feet off the floor, away from direct sunlight and drafts. For humidity, place it low in basements or high in attics where moisture/heat tends to accumulate.
Installation Guide (Typical Battery-Powered Sensor)
-
Pairing Mode: Before mounting, insert the battery and follow the app instructions to put the sensor into pairing mode (usually a button press or sequence).
-
Hub Discovery: In your smart home app or hub interface, start the device discovery process. The sensor should be identified and assigned a temporary name (e.g., "Bedroom Sensor").
-
Testing Placement: Temporarily place the sensor in its desired spot. Check the signal strength indicator in the app to confirm a solid connection for Remote Access .
-
Final Mount: Most sensors use double-sided adhesive tape. Clean the wall surface with an alcohol wipe, let it dry, peel the backing, and firmly press the sensor onto the wall for 30 seconds.
-
Naming and Calibration: Rename the device in your app clearly (e.g., "Master Bedroom West Wall") and configure your initial alert thresholds (e.g., alert if temp goes below 40°F in the crawl space).
Troubleshooting Common Issues
-
Issue 1: Inaccurate Temperature Readings.
-
Resolution: The sensor is likely being affected by an external factor. Power off the breaker and re-check that the neutral wire is secured firmly to the device and the house wiring. Move the sensor 3-5 feet away from any vents, windows, or TVs. Also, check the manufacturer's suggested mounting height, as heat stratification can cause misleading readings.
-
Issue 2: The Sensor Keeps Disconnecting.
-
Resolution: This indicates a weak mesh connection, particularly common in large US homes with brick or concrete. Install a powered, acting repeater (like a Z-Wave smart plug) halfway between the sensor and the hub to reinforce the mesh network.
-
Issue 3: Battery Life is Much Shorter Than Advertised.
-
Resolution: Check the reporting interval setting in your app. If the sensor is configured to report data every minute instead of every 10-15 minutes, it drains the battery rapidly. Also, ensure you are using high-quality lithium batteries, especially in cold environments like an unheated garage. High data frequency compromises Energy Efficiency .
4. Advanced Automation and Maximizing Value
The true power of Environmental Sensors (Temp/Humidity) is realized when they move beyond simple data logging and become active triggers for your smart home's Energy Efficiency and comfort systems.
Powerful Automation Scenarios
-
Preventing Florida Mold Growth: You live in a humid climate like Miami. The Environmental Sensors (Temp/Humidity) in your basement or attic detect the relative humidity is consistently above 60%. This triggers an automation to turn on a smart dehumidifier plugged into a smart outlet, running it until the humidity drops back down to 50%. This constant 24/7 Monitoring actively prevents mold and mildew, saving you thousands in potential damage.
-
Zone-Specific Comfort Control (The Second Floor Fix): Your central thermostat is downstairs, but your second-floor bedrooms in your two-story home are always hot. When the Environmental Sensors (Temp/Humidity) in the upstairs hallway detect a temperature difference of + 3 ∘ F from the main thermostat reading, an automation triggers your smart ceiling fans to turn on and closes a smart vent in the first-floor living room. This intelligently redirects conditioned air, significantly boosting comfort and Energy Efficiency .
-
Protecting Remote Assets (The Cabin/Vacation Home): For your mountain cabin in Colorado, you use the sensor for critical Remote Access and freeze alerts. If the sensor in the mudroom reports a temperature below 3 5 ∘ F , it automatically sends a critical alert to your phone and simultaneously activates a smart plug connected to a space heater to prevent pipes from freezing, providing crucial security and comfort.
Longevity & Maintenance
Maximizing the lifespan and reliability of your Environmental Sensors (Temp/Humidity) involves proactive care. Always keep the sensor reporting frequency low (10-15 minutes) unless you are actively diagnosing an issue; this is the number one trick for optimal battery life and Energy Efficiency . Ensure you clean the sensor's housing every few months, as dust accumulation can insulate the device and lead to falsely high temperature readings. If your sensor has a physical screen, avoid placing it in direct, intense sunlight, as this can degrade the screen and the sensitive measuring components over time. Finally, treat any alert from your 24/7 Monitoring as a call to action—these devices are designed to warn you about environmental risks before they become costly problems.
5. COMPLEMENTARY CATEGORY RECOMMENDATIONS
| Recommended Categories |
Why This Category Is Useful Specifically for This Product |
Short Usage Scenario |
| Thermostats |
The sensors provide the remote, granular temperature data that smart thermostats lack, enabling true zone control and maximizing Energy Efficiency . |
Your living room sensor tells the smart thermostat that the area is too cold, overriding the main unit's reading to maintain comfort. |
| Air Purifiers |
High humidity monitored by the sensors can trigger a smart air purifier or dehumidifier, actively combating mold, allergens, and poor air quality. |
If the humidity sensor in the basement reaches 65%, a smart plug turns on the connected dehumidifier until the level drops to 50%. |
| Smart Fans |
The sensors determine when a room needs air circulation, automatically controlling smart ceiling or tower fans to equalize temperature and improve comfort. |
The upstairs sensor hits 7 8 ∘ F , prompting the smart ceiling fan to turn on at 50% speed. |
| Central Hubs |
Most compact, battery-powered Environmental Sensors (Temp/Humidity) require a central multi-protocol hub (Z-Wave/Zigbee/Thread) for network communication and Remote Access . |
A multi-protocol hub receives a low-temperature alert from the garage sensor and sends an immediate push notification to your phone. |
| Humidifiers |
The sensors provide the precise feedback loop needed to activate and deactivate smart humidifiers or dehumidifiers to maintain optimal indoor air quality. |
The sensor reports 30% humidity in the nursery, triggering the smart humidifier to run to prevent dry air discomfort. |
| Smart Power |
Smart plugs and outlets are necessary to control non-smart appliances (like simple space heaters or fans) based on the data reported by your Environmental Sensors (Temp/Humidity) . |
The attic sensor reports 9 5 ∘ F , turning on a fan plugged into a smart outlet to vent the heat. |
| Shades Blinds |
Temperature sensors near windows can automate smart blinds to close when direct sun exposure is raising the indoor temperature, preserving Energy Efficiency . |
The sensor detects a rapid temperature spike near the south-facing window, causing the smart blind to close 50%. |
By integrating a network of Environmental Sensors (Temp/Humidity) , you gain an unmatched level of knowledge and control over your home's climate. You are no longer guessing what is comfortable or efficient; you are operating based on real-time, room-specific data. This small but powerful investment enables crucial 24/7 Monitoring , delivers immediate data via Remote Access , and transforms your HVAC use for maximal comfort and genuine Energy Efficiency . Choose the right sensors for your needs today, and take the first step toward a home that not only feels better but performs smarter.